
- Step 1: Season the Chicken
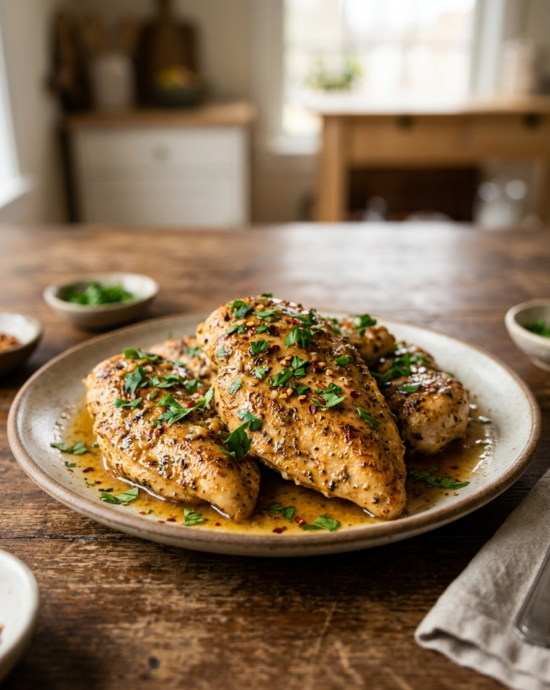
Pat the chicken pieces completely dry with paper towels — removing surface moisture is the single most important preparation step for achieving deeply golden, crispy skin. Any residual moisture on the chicken surface will create steam in the pan rather than allowing proper browning to occur, resulting in pale, soft skin that lacks the beautiful caramelized exterior this dish is known for. In a small bowl, combine the paprika, onion powder, salt, and black pepper, and stir until evenly blended. Sprinkle this spice mixture generously over all surfaces of each chicken piece, patting it gently into the skin and flesh to ensure good adhesion. Allow the seasoned chicken to rest at room temperature for 10 minutes before cooking.
- Step 2: Sear the Chicken — First Side
In a large, oven-safe skillet or cast-iron pan, heat the olive oil and 2 tablespoons of butter together over medium-high heat. When the butter is fully melted and the mixture begins to sizzle and shimmer, carefully add the chicken pieces skin-side down in a single layer. Do not crowd the pan — work in batches if necessary, as overcrowding causes steaming instead of searing. Press each piece gently with a spatula for 30 seconds to maximize skin-to-pan contact. Cook completely undisturbed for 5 to 7 minutes until the skin has developed a deeply golden, crispy, caramelized exterior. Resist the urge to check or move the chicken during this critical searing period, as lifting it too early tears the skin and interrupts browning.
- Step 3: Flip and Build the Garlic Butter
Flip the chicken pieces carefully to the other side and sear for an additional 3 minutes. Reduce the heat to medium and add the remaining 4 tablespoons of butter directly to the pan. As the butter melts and begins to foam, add all the minced garlic at once and stir it rapidly through the melting butter, ensuring it distributes evenly around all the chicken pieces. Cook the garlic in the butter for 1 to 2 minutes, stirring frequently, until it becomes fragrant, lightly golden, and deeply aromatic — watch carefully, as garlic that tips into dark brown territory turns bitter and will compromise the entire sauce. Add the soy sauce and lemon juice and stir to incorporate them into the building garlic butter sauce.
- Step 4: Baste Continuously
Using a large spoon or small ladle, begin basting the chicken pieces continuously with the garlic butter pooled in the pan, tilting the pan slightly to collect the sauce if necessary. Spoon the hot, aromatic butter repeatedly over the top of each chicken piece every 30 seconds, ensuring the garlic-flecked sauce coats every surface generously. This basting technique — called arroser in classical French cooking — is the defining step that builds the lacquered, deeply flavored exterior that makes garlic butter chicken so irresistible. The hot butter carries the garlic flavor and soy sauce deepness directly into the chicken surface with each pass. Continue basting over medium heat for 3 to 4 minutes until the sauce has reduced slightly and coats the chicken beautifully.
- Step 5: Finish in the Oven
Transfer the entire pan to a preheated oven at 190°C (375°F) and cook for 15 to 18 minutes until the chicken reaches an internal temperature of 74°C (165°F) at the thickest part. Oven-finishing achieves two things simultaneously that stovetop cooking alone cannot: it cooks the chicken through to the bone evenly without burning the garlic butter on the bottom of the pan, and it allows the skin to continue crisping in the dry oven heat from all sides rather than just the bottom. Baste the chicken once more at the halfway point with the pan juices to keep the surface lacquered and moist. The finished chicken should be deeply golden, fragrant with roasted garlic, and glistening with butter.
- Step 6: Rest and Serve
Remove the pan from the oven and allow the chicken to rest in the pan, undisturbed, for 5 full minutes before serving. This resting period is non-negotiable — it allows the internal juices that have been driven to the surface by the oven's heat to redistribute evenly back throughout the meat, resulting in juicier, more flavorful chicken in every bite. Spoon the garlic butter pan sauce over each piece one final time before plating. Transfer to a warm serving platter, drizzle generously with all the remaining pan sauce, scatter fresh chopped parsley over the top, and serve immediately with lemon wedges on the side for squeezing. The pan sauce — rich with garlic, butter, soy, and chicken drippings — should not be wasted.
Table of Contents
What Is Garlic Butter Chicken?
Garlic butter chicken is a pan-seared and oven-finished chicken dish cooked in a rich, aromatic sauce of melted butter, roasted garlic, soy sauce, and lemon — a recipe that sits at the delicious crossroads of Western butter-basting technique and the Filipino kitchen’s deep love for garlic-forward, savory flavors. While garlic butter chicken exists in many global culinary traditions, the Filipino version is distinguished by the characteristic addition of soy sauce and calamansi or lemon juice, which add a distinctly umami depth and citrusy brightness that transforms the dish from a simple European preparation into something uniquely adapted to the Filipino palate.
The Filipino appreciation for garlic (bawang) is legendary — it appears in virtually every savory dish in the national cuisine, from the dawn of sinangag (garlic fried rice) to the garlicky brine of chicken adobo. Garlic butter chicken represents the modern Filipino home cook’s embrace of Western techniques applied to locally beloved ingredients and flavor profiles. The dish has become a staple of Filipino family cooking and casual restaurant menus alike, celebrated for its bold flavor, remarkable simplicity, and the extraordinary versatility of its garlic butter pan sauce.
What makes this recipe particularly compelling is the combination of two cooking techniques: pan-searing for the perfectly crispy skin, and oven-finishing for even, thorough cooking. The butter basting step that bridges the two creates a lacquered, deeply flavored exterior that elevates the dish far above ordinary pan-cooked chicken. The result is chicken that is simultaneously crispy-skinned, juicy-fleshed, and coated in a sauce so aromatic and rich that steamed rice becomes the only logical accompaniment — soaking up every last drop of the deeply savory garlic butter that pools on the plate.
Ingredient Notes
- Butter: Unsalted butter gives you full control over the final salt level of the dish. Use high-quality European-style butter with a higher fat content for the richest, most flavorful sauce — brands like Anchor or Elle & Vire produce noticeably more complex, creamier garlic butter than standard commercial varieties.
- Garlic: Use the full 10 cloves — garlic butter chicken is emphatically a garlic-forward dish, and underseasoning with garlic is the most common reason the finished dish tastes flat. Freshly minced garlic is essential; pre-minced jarred garlic lacks the volatile aromatics that make freshly cut garlic so powerfully fragrant and flavorful.
- Chicken Thighs and Drumsticks: Bone-in, skin-on dark meat is the ideal cut for garlic butter chicken — the fat content keeps the meat moist and flavorful throughout the long sear-and-bake process. Avoid boneless, skinless breasts, which dry out during oven finishing and lack the richness necessary to carry the garlic butter sauce.
- Soy Sauce: A Filipino touch that adds deep, fermented umami saltiness to the garlic butter sauce. Use a standard Filipino soy sauce like Silver Swan or Datu Puti rather than Japanese soy sauce, which is lighter and less assertively savory in character.
- Fresh Thyme: Thyme’s woody, slightly floral herbal character complements garlic and butter extraordinarily well. Strip fresh thyme leaves from the stems directly into the pan rather than adding whole sprigs, which can become charred and bitter during the searing stage.
Ingredient Suggestions
- Chili flakes or fresh bird’s eye chili — A small amount added with the garlic introduces a building, fragrant heat that elevates the richness of the garlic butter sauce without dominating the dish.
- Parmesan cheese — A tablespoon of grated Parmesan stirred into the pan sauce during the basting stage adds a nutty, salty complexity that deepens the overall flavor profile beautifully.
- White wine or chicken broth — A quarter cup deglazed into the pan before adding the butter creates a slightly lighter, more complex sauce with greater depth and a subtle acidity.
- Rosemary sprigs — One or two fresh rosemary sprigs cooked alongside the thyme contribute a piney, resinous fragrance that pairs particularly well with the richness of the butter.
- Honey — A teaspoon stirred into the garlic butter creates a faintly sweet, lacquered glaze on the chicken skin that caramelizes beautifully in the oven.
Helpful Tips & Pro Tips
- Dry the chicken skin completely before cooking. This is the most important step for crispy skin. Use paper towels and press firmly — even a small amount of surface moisture prevents the Maillard reaction and produces pale, soft skin. For exceptionally crispy results, leave the seasoned chicken uncovered in the refrigerator for 1 hour before cooking to air-dry the skin.
- Use a cast-iron pan for best results. Cast iron retains and distributes heat more evenly than stainless steel or non-stick pans, producing a more consistent sear across the entire surface of the chicken skin. It also transitions safely from stovetop to oven without any issues.
- Why is my garlic butter chicken skin not crispy? Soggy skin is almost always caused by moisture — either from not drying the chicken adequately before cooking, or from covering the pan during cooking. Never cover the pan; steam is the enemy of crispy chicken skin. Also ensure the oil and butter are fully hot before the chicken goes in.
- Don’t let the garlic burn. Garlic goes from perfectly golden to burnt and bitter in under 30 seconds. Keep the heat at medium when adding garlic — never high — and stir constantly. If the garlic starts darkening too quickly, immediately add a splash of chicken broth to cool the pan and rescue the sauce.
- Rest the chicken in the pan, not on a cutting board. Resting in the pan means the chicken continues to benefit from the residual heat of the garlic butter sauce pooled around it, keeping it warm and allowing the sauce to thicken slightly from the chicken’s resting juices.
How to Serve and Store
Serve garlic butter chicken immediately after resting, plated on warm dishes with the entire pan sauce spooned generously over each piece. The natural accompaniment is steaming white rice to absorb the garlic butter sauce, though garlic mashed potatoes, crusty bread, or buttered pasta all work beautifully. Garnish with fresh parsley and lemon wedges; a squeeze of lemon over the finished chicken brightens the richness of the sauce.
Store leftover garlic butter chicken in an airtight container in the refrigerator for up to 3 days. To reheat while preserving the crispy skin, place in a preheated 180°C oven for 10 minutes rather than microwaving, which softens the skin. Leftover garlic butter chicken is excellent shredded and tossed with pasta or sliced over garlic fried rice. Freeze cooked portions for up to 2 months; thaw overnight in the refrigerator before reheating.
Substitutions
- Butter → Vegan butter or coconut oil — A dairy-free alternative that still produces a rich, flavorful basting sauce; coconut oil adds a faint tropical note.
- Soy sauce → Coconut aminos — A gluten-free, slightly sweeter substitute with the same umami depth; a perfect 1:1 replacement.
- Chicken thighs → Boneless chicken breast — A leaner substitute; reduce oven time to 12 minutes and monitor carefully to prevent drying out.
- Fresh thyme → Dried Italian herbs — A budget-friendly pantry substitute; use half the quantity as dried herbs are more concentrated.
- Olive oil → Avocado oil — A neutral, high-smoke-point oil ideal for high-heat searing; no flavor compromise.
- Lemon juice → Calamansi juice — The Filipino citrus alternative that adds a more floral, aromatic brightness perfectly suited to the Filipino palate.
Suggested Recipes
- Chicken Inasal — Shares garlic butter chicken’s love of bold garlic flavor and basting technique, but uses annatto, lemongrass, and vinegar for a distinctly Filipino-Visayan flavor profile.
- Chicken Adobo — Another garlic-forward Filipino chicken staple that showcases the national cuisine’s deep, enduring love for assertively seasoned poultry.
- Garlic Butter Shrimp — Uses the exact same garlic butter technique applied to shrimp for a faster, equally indulgent dish perfect for weeknight cooking.
- Chicken Afritada — A tomato-based Filipino braised chicken that, like garlic butter chicken, celebrates the beauty of bold, simple flavors in everyday Filipino home cooking.
Frequently Asked Questions

Jeff Smith
"Cooking is the intersection of history, science, and emotion."
For me, the kitchen has always been a laboratory of culture. With a background deeply rooted in digital strategy and precision, I approach the culinary arts with the same rigor I apply to the digital landscape—analyzing flavors, perfecting techniques, and documenting the nuance that makes Filipino cuisine truly world-class.
Findme Recipe was born from a desire to bridge the gap between traditional heritage and the modern home cook. Whether it is mastering the perfect balance of acidity in a classic Adobo or simplifying complex regional dishes for everyday kitchens, my mission is to preserve our culinary identity through accessible, data-backed, and delicious content.
I am not just building a database; I am cultivating a community where every Filipino kitchen feels empowered, every ingredient is celebrated, and every family heirloom recipe finds a place to thrive.
Join me as we translate the soul of our islands into recipes for the next generation.