Grilling a great steak isn’t about some secret marinade or an expensive cut — it’s about heat control, timing, and knowing when to leave the meat alone. Most steak mistakes happen from over-managing it: flipping too often, pressing it down with a spatula, or pulling it off the grill way too early because it looks done on the outside.
Once you understand how to grill steak using a proper two-zone fire and a thermometer instead of guesswork, you’ll get consistent, restaurant-quality results whether you’re working with a ribeye, New York strip, or a cheaper cut like flank. None of this requires fancy equipment or years of grilling experience — just a handful of habits that professional cooks rely on and home grillers often skip. Here’s the process from picking your steak to letting it rest, broken down step by step.
Choose the Right Cut and Let It Come to Room Temperature
Ribeye, New York strip, and filet mignon are the classic grilling cuts because of their marbling and tenderness, but flank and skirt steak grill beautifully too if you’re working with a tighter budget — they just need a quick sear over high heat rather than a long cook. Whatever cut you choose, aim for at least three-quarter-inch thickness so the inside has time to cook through before the outside overcooks. Thinner cuts tend to overcook almost instantly on a hot grill, leaving little margin for error even for experienced cooks.
Pull the steak out of the fridge 30 to 45 minutes before grilling. A cold steak straight from the refrigerator cooks unevenly, with a well-done exterior ring and a cold center, because the outside finishes long before the middle catches up.
Set Up a Two-Zone Fire
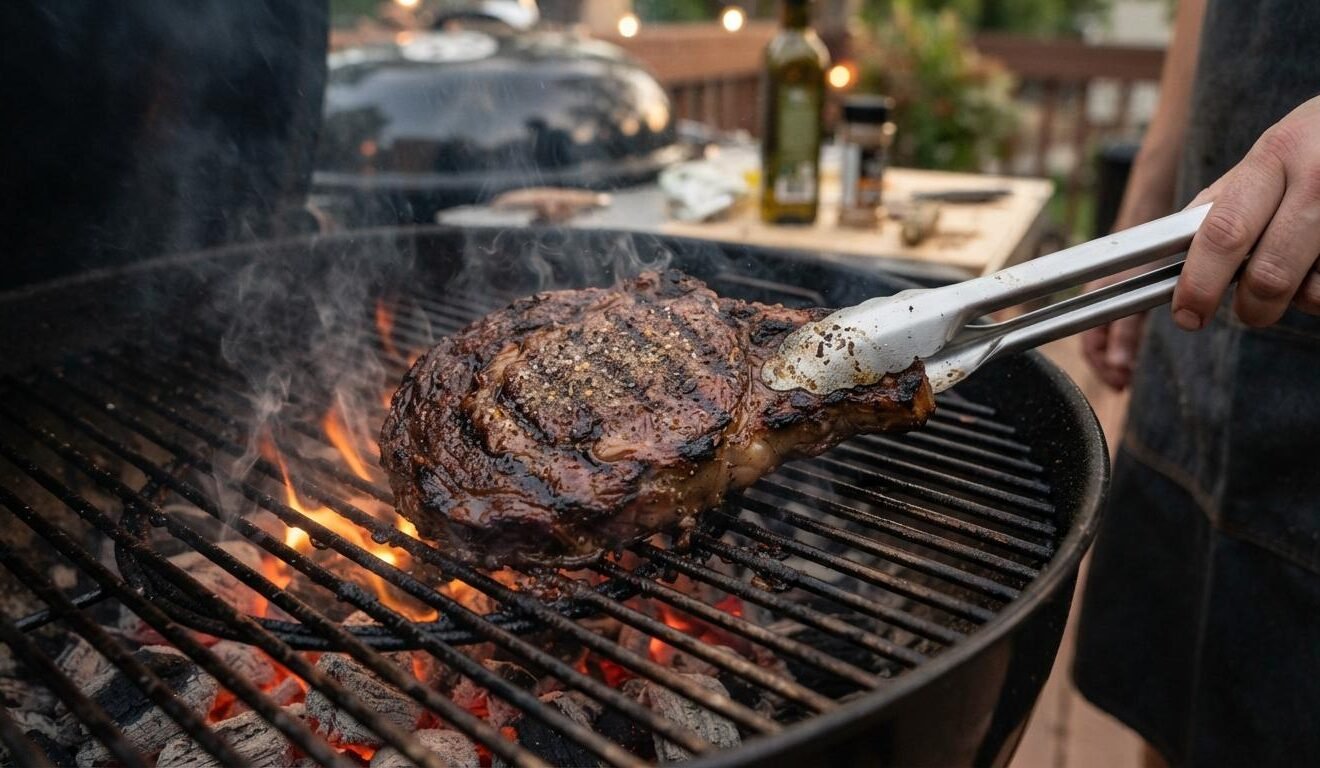
This is the single most useful grilling technique nobody tells beginners about. Instead of spreading coals or heat evenly across the whole grill, push them to one side to create a hot zone and a cooler zone. Sear the steak over the hot side for a deep crust, then move it to the cooler side to finish cooking through without burning the outside.
For a gas grill, this just means turning on only half the burners. This setup gives you control that a single, even heat level simply can’t — it’s the difference between a steak with a good crust and even doneness, versus one that’s charred outside and raw in the middle. It also gives you a safe place to move the steak if flare-ups happen from dripping fat, without having to pull it off the grill entirely and interrupt the cooking process.
Season Simply and Sear With Confidence
Salt the steak generously on both sides at least 15 minutes before grilling — this pulls moisture to the surface initially, then reabsorbs it along with the salt, seasoning the meat all the way through rather than just the surface. Coarse black pepper and a light coat of oil round out everything a good steak needs.
Place it on the hot zone and leave it alone. Resist the urge to move it around or check underneath every thirty seconds — let it sear for 3 to 4 minutes undisturbed to build a proper crust, then flip once and repeat on the other side.
Use a Thermometer, Not the Clock
Timing charts are useful as a rough guide, but grill temperatures vary too much to rely on minutes alone. Pull a ribeye off the hot zone once it reads about 10 degrees below your target, since it’ll keep cooking as it rests. For medium-rare, pull it around 125°F; for medium, around 135°F.
This is the step that separates a genuinely great steak from a guessed one. An instant-read thermometer costs less than a decent steak dinner and removes almost all the anxiety from grilling — no more cutting into the meat to check, which just lets the juices escape.
Rest the Steak Before You Cut Into It
Let the steak rest for at least 5 minutes after pulling it off the grill, tented loosely with foil. During cooking, the muscle fibers tighten and push juices toward the center; resting gives them time to relax and redistribute that moisture evenly through the meat.
Skip this step and you’ll watch all that flavorful juice pool out onto the cutting board the second you slice into it. It’s a small bit of patience for a noticeably juicier result — worth every minute of waiting.
Don’t Forget About Carryover Cooking
Carryover cooking refers to the fact that meat continues cooking even after it’s off direct heat, since residual heat keeps working its way toward the center for several minutes. This is exactly why pulling the steak at your target temperature actually overshoots it — the internal temperature can climb another 5 to 10 degrees while it rests.
This is a detail even experienced home cooks sometimes forget, especially with thicker cuts that hold more residual heat. Building this into your pull temperature, rather than treating your target doneness as the number on the thermometer when it comes off the grill, is what actually gets you consistent results cook after cook.
Slice Against the Grain
Once your steak has rested, take a close look at the direction the muscle fibers run before you start cutting. Slicing with the grain leaves those long fibers intact, which makes every bite noticeably chewier no matter how well the steak was cooked.
Cut perpendicular to those fibers instead, shortening them and making the meat far easier to chew. This matters most with tougher, more affordable cuts like flank or skirt steak, where the difference between slicing with versus against the grain can be the difference between a tender dinner and a genuinely tough one. Slice at a slight angle rather than perfectly straight down for pieces with a stronger visible grain, which shortens the fibers even further and adds a bit of extra tenderness to every bite.
Frequently Asked Questions

Jeff Smith
"Cooking is the intersection of history, science, and emotion."
For me, the kitchen has always been a laboratory of culture. With a background deeply rooted in digital strategy and precision, I approach the culinary arts with the same rigor I apply to the digital landscape—analyzing flavors, perfecting techniques, and documenting the nuance that makes Filipino cuisine truly world-class.
Findme Recipe was born from a desire to bridge the gap between traditional heritage and the modern home cook. Whether it is mastering the perfect balance of acidity in a classic Adobo or simplifying complex regional dishes for everyday kitchens, my mission is to preserve our culinary identity through accessible, data-backed, and delicious content.
I am not just building a database; I am cultivating a community where every Filipino kitchen feels empowered, every ingredient is celebrated, and every family heirloom recipe finds a place to thrive.
Join me as we translate the soul of our islands into recipes for the next generation.