
- Step 1: Prepare and Toast the Garlic
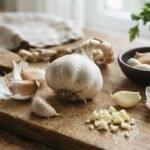
The single most important step in making exceptional sinangag is properly toasting the garlic, and it deserves full attention before anything else touches the pan. Peel and mince the garlic finely but not too fine — very fine minced garlic burns quickly in the hot oil, turning bitter rather than nutty. Heat the vegetable oil or lard in a large wok or skillet over medium heat. Add all the minced garlic at once and stir constantly, watching carefully as the garlic sizzles and begins to turn golden. This process takes three to five minutes and requires constant attention — garlic goes from perfectly toasted to burnt in a matter of seconds. The finished garlic should be deep golden brown, crispy at the edges, and filling the kitchen with a nutty, sweet, intoxicating aroma. Remove a generous pinch of the most golden garlic to reserve as a crispy garnish.
- Step 2: Add and Break Up the Cold Rice
With the toasted garlic still in the oil in the wok, increase the heat to high. Add the cold day-old rice all at once, breaking up any large clumps quickly with a spatula before they heat through and fuse into unmovable masses. Work fast — press down on the clumps and break them apart vigorously. Cold refrigerated rice is ideal for sinangag precisely because the individual grains have dried out and separated during refrigeration, making them much easier to fry individually rather than clumping together into sticky masses. Freshly cooked rice, by contrast, is too wet and starchy to fry properly, resulting in a clumped, pasty texture rather than the separated, individually distinct grains that define well-made sinangag. If using freshly cooked rice, spread it on a tray and refrigerate for at least two hours before frying.
- Step 3: Stir-Fry Over High Heat
Once all the clumps are broken up, stir-fry the rice over the highest heat your stove can produce, tossing and stirring continuously for three to four minutes. The rice should crackle and pop slightly against the hot wok surface — this sound indicates the grains are drying out and developing the light, toasty exterior that makes sinangag so satisfying. Each grain should be coated in the garlic-infused oil and beginning to separate from the others. If the rice is sticking to the wok, add a small drizzle of additional oil around the edge of the pan. The rice should not be steaming heavily; steam is the enemy of good fried rice, indicating too much moisture and insufficient heat. The wok should be producing light sizzling and crackling sounds throughout the cooking process for the best result.
- Step 4: Season and Finish the Rice
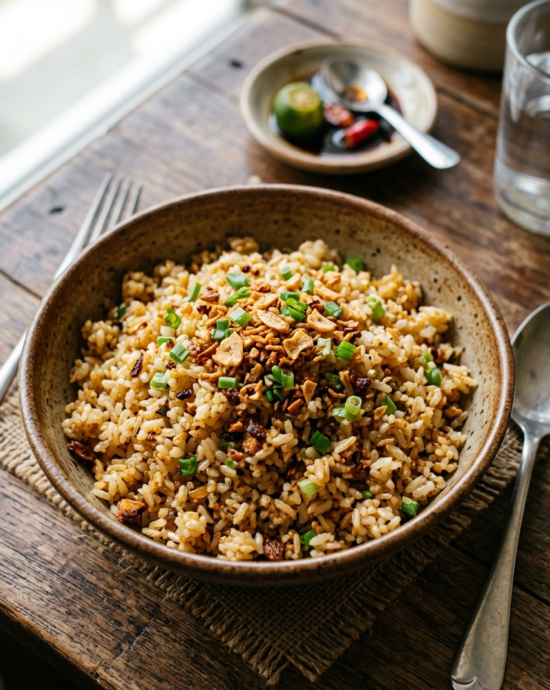
Season the stir-fried rice generously with salt and white pepper, tossing continuously to distribute the seasoning evenly throughout every grain. Taste the rice and adjust the seasoning — sinangag should be boldly seasoned, as the flavors are simple and the garlic and oil need salt to fully express their potential. Under-seasoned sinangag is one of the most common disappointments in home cooking; do not be timid with the salt. Continue tossing over high heat for another one to two minutes until the rice is heated through, evenly seasoned, and each grain is glistening with the garlic-scented oil. The finished sinangag should be loose and separate rather than clumped, slightly crispy at the edges of some grains, and deep golden in color from the generous toasted garlic coating every grain.
- Step 5: Plate and Serve with Breakfast Companions
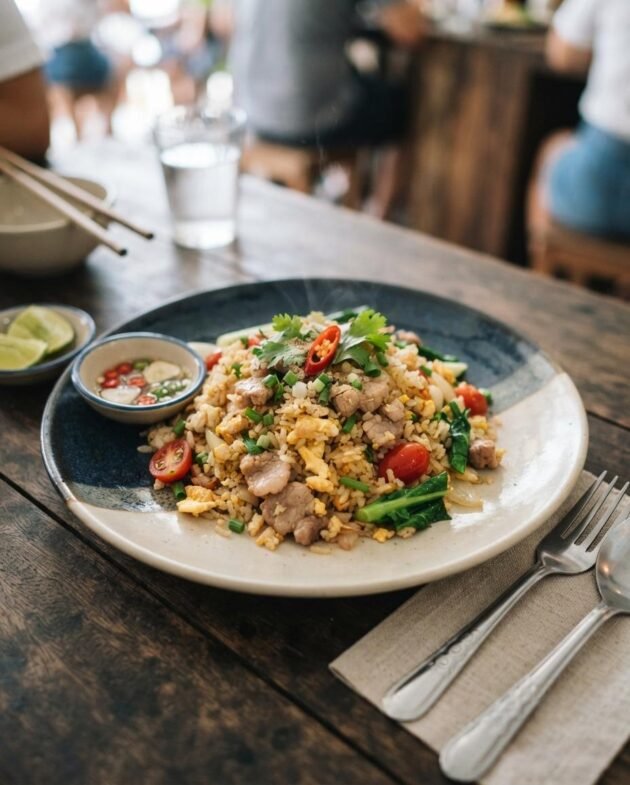
Remove the wok from heat and transfer the finished sinangag to individual plates or a large serving bowl. Scatter the reserved crispy fried garlic chips generously over the top of the rice — these golden, crunchy bits of garlic are the visual and aromatic signature of properly made sinangag and are as essential to the experience as the rice itself. Sprinkle chopped green onions over the garlic for a touch of freshness and color. Sinangag is the anchor of the traditional Filipino breakfast plate known as silog — it is served alongside a fried egg or two cooked sunny-side up, with a selection of paired proteins such as tocino, longganisa, daing na bangus, or tapa. The runny yolk from the fried egg is meant to be broken and mixed into the garlic rice, creating an unofficial sauce that binds the entire breakfast together beautifully.
- Calories:290 kcal14.5%
- Protein:5 g10%
- Carbohydrates:52 g17%
- Sugar:g
- Energy:1213 kJ14.5%
- Fat:7 g10%
Table of Contents
What Is Sinangag?
Sinangag is the essential Filipino garlic fried rice that forms the cornerstone of the beloved Filipino breakfast tradition known as silog — a portmanteau combining sinangag with itlog (egg) and the name of whatever protein accompanies it (tocilog, longsilog, bangsilog, and so on). It is a remarkably simple dish made by frying cold day-old rice in generous amounts of oil with an abundance of minced garlic until the garlic is deeply golden and fragrant and each grain of rice is glistening, separated, and lightly toasted. Despite its simplicity, sinangag is one of the most satisfying preparations in all of Filipino cuisine — a dish where technique, the quality of the garlic, and the absolute necessity of using cold, day-old rice over freshly cooked distinguish extraordinary sinangag from mediocre attempts. The dish reflects the resourceful nature of Filipino home cooking, where leftover rice from the previous evening’s dinner is never wasted but transformed into something arguably better than the original plain steamed rice. In Filipino culture, sinangag is intimately associated with early morning warmth — it is the smell of garlic frying in oil that signals the beginning of the day and the promise of a full, satisfying meal before work or school. The dish is beloved across all social classes and regions, from the most modest carinderia to high-end Filipino restaurants, and its humble ingredients belie its capacity to bring deep comfort and pleasure to anyone who eats it. Sinangag represents Filipino breakfast at its most pure and most essential.
Ingredient Notes
- Day-Old Rice: Refrigerated day-old rice is the single non-negotiable ingredient for proper sinangag — the cold, slightly dried grains fry individually and develop a pleasantly toasty exterior. Never attempt to make sinangag with freshly cooked rice; the excess moisture produces a clumped, pasty texture that cannot be corrected.
- Garlic: Use the freshest, firmest garlic you can find — it should feel heavy and solid with no soft spots or green sprouts. The generous quantity of garlic in sinangag is intentional and essential; using less produces a pale, less fragrant rice that misses the entire point of the dish.
- Oil or Lard: Traditional sinangag is made with lard, which produces a richer, more deeply porky flavor than vegetable oil. If using vegetable oil, choose a neutral, high-smoke-point oil such as canola or rice bran. Olive oil and other strongly flavored oils are not suitable for sinangag.
Ingredient Suggestions
- Fried Egg (Sunny-Side Up) — The classic and non-negotiable sinangag companion — the runny yolk creates a natural sauce when broken over the rice.
- Tocino — Sweet, cured pork belly is the most popular silog pairing; its caramelized edges and sugary pork flavor contrast beautifully with the savory garlic rice.
- Longganisa — Garlicky Filipino sausage alongside garlic rice doubles the garlic flavor in the most satisfying way possible.
- Daing na Bangus — Fried dried milkfish provides a salty, crispy protein element that pairs perfectly with the simple, clean flavors of sinangag.
Helpful Tips & Pro Tips
- The garlic must be deeply golden — not just lightly yellow — before the rice is added. Light garlic lacks the nutty, caramelized sweetness that defines authentic sinangag. Take your time at this step; the rest of the recipe moves very quickly.
- Break every clump of cold rice before it heats through. Cold rice clumps fuse solid when heated and become impossible to break apart; tackle them within the first thirty seconds of adding the rice to the wok.
- Use the highest heat your stove produces throughout the rice frying stage. High heat evaporates moisture quickly, crisps the grains, and creates the characteristic separation that distinguishes excellent sinangag from steamed clumped rice.
- Why is my sinangag clumping? The most common cause is using freshly cooked rice that retains too much moisture. Always refrigerate your rice overnight, and if you need to make sinangag same-day, spread the rice on a tray and refrigerate uncovered for at least two hours.
- Season sinangag more boldly than you think necessary. Cold rice dulls flavor, and the simple garlic-oil-rice combination needs generous salt to taste properly seasoned. Under-seasoned sinangag is the single most common disappointment; be generous and taste as you go.
How to Serve and Store
Sinangag is best eaten immediately after cooking while the garlic is fragrant and the grains are at their crispest. Leftover sinangag can be stored in an airtight container in the refrigerator for up to three days and actually makes excellent base material for a second round of fried rice with added ingredients. Reheat in a wok or skillet over high heat with a small drizzle of oil, tossing until the grains separate and are heated through — do not microwave, as this steams the rice and destroys the texture. Sinangag can technically be frozen for up to one month, though the texture upon reheating is significantly less crispy than freshly made.
Substitutions
- Vegetable Oil → Coconut Oil — adds a subtle tropical sweetness that pairs beautifully with the garlic; use refined coconut oil for a neutral aroma.
- White Rice → Brown Rice — produces a nuttier, more fiber-rich sinangag; ensure it is also day-old and well-chilled before frying.
- Fresh Garlic → Roasted Garlic — produces a sweeter, mellower sinangag with deeper caramelized notes; mash roasted cloves before adding.
- White Pepper → Black Pepper — stronger and more assertive; use slightly less than white pepper as it has a more pronounced heat.
- Regular Salt → Garlic Salt — intensifies the garlic flavor further and adds a subtle complexity to the seasoning.
- Plain Rice → Jasmine Rice — the fragrant long-grain variety produces a particularly aromatic sinangag with a delicate floral note.
Suggested Recipes
- Tapsilog — sinangag paired with cured tapa beef and a fried egg, the most iconic Filipino breakfast plate and the dish that popularized the silog tradition.
- Tocilog — sinangag with sweet tocino pork; the contrast between the savory garlic rice and sweet caramelized pork is a classic Filipino breakfast pairing.
- Longsilog — garlic rice with garlicky longganisa sausage and a fried egg; for garlic lovers, this doubles down on the aromatics in the most satisfying way.
- Java Rice — a restaurant-style yellow garlic rice using turmeric and margarine that is the festive sibling of sinangag, typically served with grilled chicken.
Frequently Asked Questions

Jeff Smith
"Cooking is the intersection of history, science, and emotion."
For me, the kitchen has always been a laboratory of culture. With a background deeply rooted in digital strategy and precision, I approach the culinary arts with the same rigor I apply to the digital landscape—analyzing flavors, perfecting techniques, and documenting the nuance that makes Filipino cuisine truly world-class.
Findme Recipe was born from a desire to bridge the gap between traditional heritage and the modern home cook. Whether it is mastering the perfect balance of acidity in a classic Adobo or simplifying complex regional dishes for everyday kitchens, my mission is to preserve our culinary identity through accessible, data-backed, and delicious content.
I am not just building a database; I am cultivating a community where every Filipino kitchen feels empowered, every ingredient is celebrated, and every family heirloom recipe finds a place to thrive.
Join me as we translate the soul of our islands into recipes for the next generation.